

Today I’m continuing a series of posts on how to make DIY wood signs. The first post in the series was how to paint DIY wood signs and the next step is transferring the design onto wood! One of my favorite ways to do this is by making DIY wood sign stencils with vinyl!
I used vinyl to make my large DIY wood sign and my DIY welcome sign. It made the process so much easier, faster, and more professional looking!
This method is also a great option if you are making wooden signs to sell and want a more professional look!


Note, this post contains some affiliate links. For more info see my disclosures here.
Today I’m sharing a step by step tutorial on how to make wood signs with vinyl. The most important tool you need to create a vinyl stencil is a vinyl cutting machine, such as a Silhouette Cameo (used in this tutorial) or Cricut. These crafting machines are a small investment up front, but they have the ability to create so many cool things!
See how to make a large wood sign with Cricut and this DIY wood sign with Cricut too.
Side note, if you don’t have a vinyl machine, you can still create the below sign by transferring the design onto wood with this wood transfer method using a pencil.
Also, this tutorial post is long, but I really want to show all the steps with details and lots of photos so you feel like you can totally do this too! It really isn’t hard once you get the hang of it 🙂
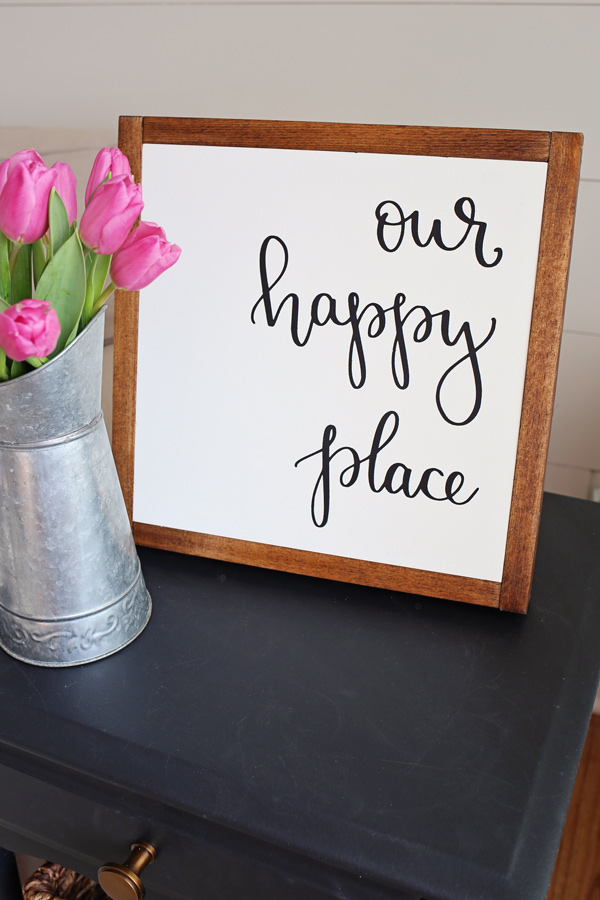
FREE “OUR HAPPY PLACE” PRINTABLE:
I’m sharing a free 12″x12″ printable of this sign design featuring my own hand lettering, so you can create this exact same sign! You can get your free printable here!

How to make DIY wood sign stencils with vinyl
Supplies Needed:
- Silhouette Cameo
- Printable JPEG file of your design (get your free printable here)
- Vinyl (I use Oracal 631 vinyl)
- Vinyl weeding tool or something with a pin end
- Transfer tape (I use Oratape HT55)
- Transfer Tape Roller (optional)
- Vinyl Squeegee or old credit card
- Painter’s Tape (at least 1″ wide)
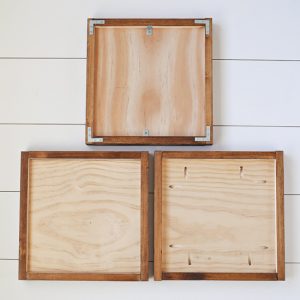
- Painted Wood Sign Backing*
*Make sure you have a wood sign backing piece that is painted and ready to go. For this tutorial, I used a 1×12 pine board (actual width of 11.75″) and I cut it to a length of 11.75″ so the final wood sign backing size is 11.75″x11.75″. Your local home improvement store can cut the wood for you if needed. For details on wood sign backing types and how to paint them, see how to paint DIY wood signs.*
Part 1: Create Vinyl Decal Stencil in Silhouette Studio
1. Open the “Our Happy Place -12×12” free printable JPEG file (available at the bottom of this post) in Silhouette Studio, which is the software that comes with the Silhouette Cameo.
Note, the file is actually 11.75″ x11.75″ (rather than 12×12) so it’s a perfect fit for the wood base I’m using).
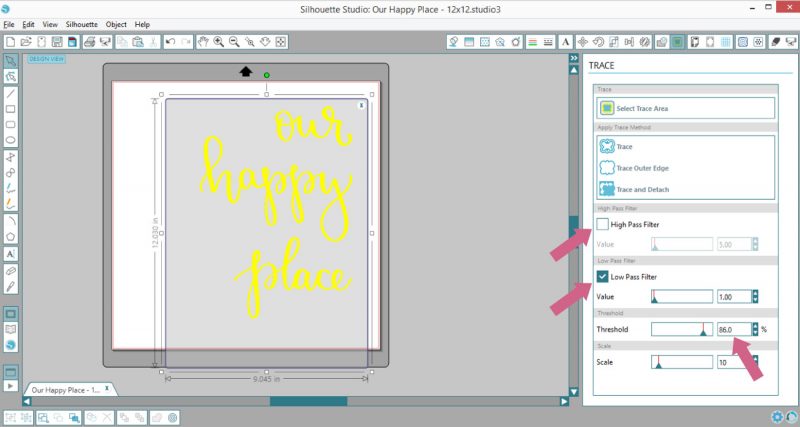
Then, open the trace window and click on “Select Trace Area”

2. Use your mouse to draw a large tracing box around the design. Sometimes, I will do just one word at a time if necessary to get a cleaner cut, but I didn’t need to with this design.
Next, deselect “High Pass Filter” and then select “Low Pass Filter”. Change the Threshold percentage to around 86%. You can experiment adjusting the threshold percentage rate, but essentially you want to ensure the yellow tracing highlights are filling in all the letters to the edges and that there are no tiny gaps not highlighted to ensure a clean cut of your vinyl stencil for your DIY wood sign! Also, it helps to zoom in for this step!
3. Select “Trace” and then move the printable image out of the way to reveal your tracing outline. Zoom in to make sure you have clean cut lines of the design. If not, you can go to “Edit” then “undo” and adjust the threshold to get better cut lines.
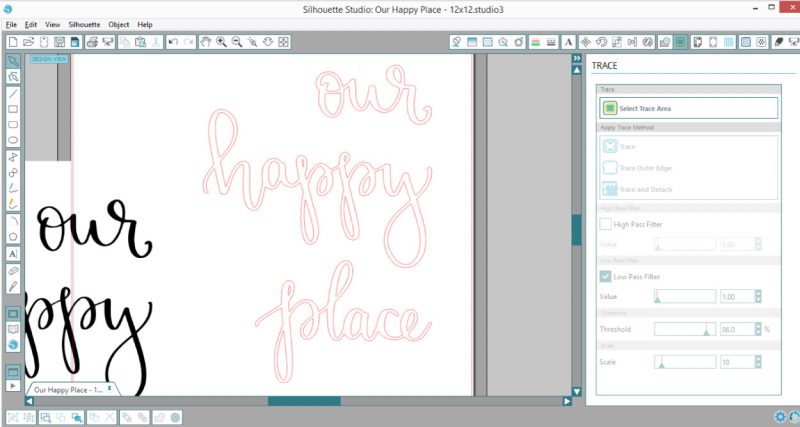
Once your image has been traced, go ahead and delete the black and white printable image so that just your traced design with the red lines remains.
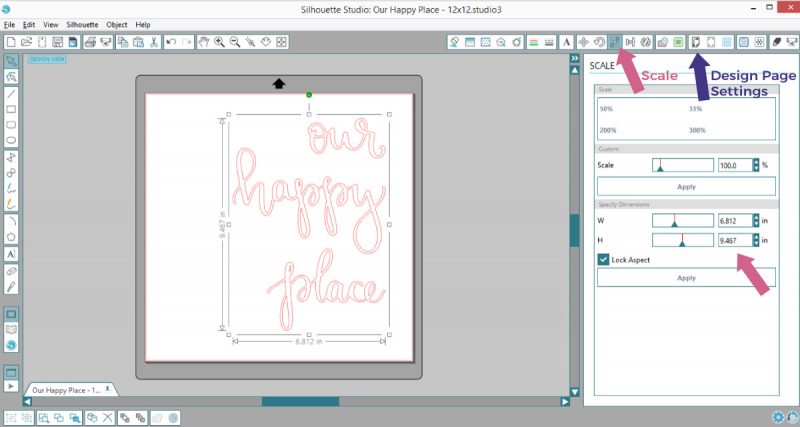
Note, this design is sized already exactly for a 12×12 sign, but, the cool thing about Silhouette Studio and vinyl decals is that you can resize the design and or the artboard to any size you need.
To change the design size, click on the traced outline, open the “Scale” window, check the “Lock Aspect” box, then change the width or height to your desired size settings, and click on “Apply”. And to change the artboard setting, open the “Design Page Settings” window and adjust the page size as needed.
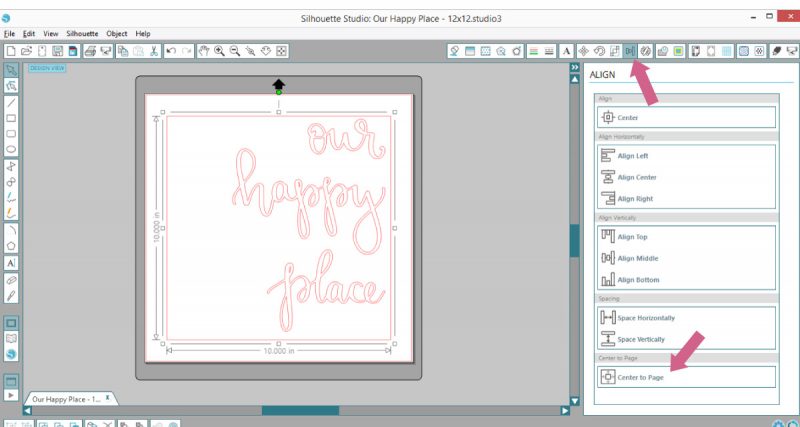
4. Next, we need to create a square cut line around our design, this will be helpful later when we apply the vinyl stencil to our sign.
Open the “Scale” window, then select the rectangle tool from the left toolbar, and draw a box around the design. With the box selected, in the scale window options under “specify dimensions”, resize the box into a 10″ x 10″ square.
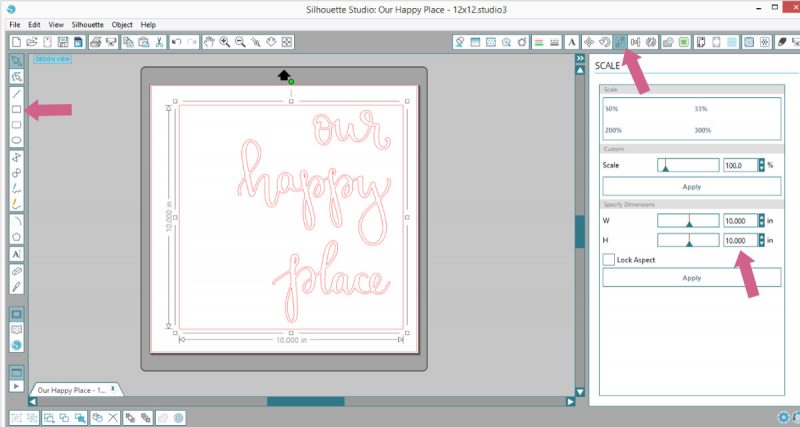
Then, center the square cut line on the page. To do this, open the “Align” window, make sure the square is still selected, and click on “center to page”.
5. Your vinyl stencil outline is ready to cut, send it to the Silhouette machine and cut your vinyl! I always use Oracal 631 vinyl for any vinyl stencils or decals because it is a high quality indoor/outdoor vinyl and is easy to apply and remove.
Also, I plan on adding a separate tutorial on how to set up vinyl settings on a Silhouette soon if that’s something you need a tutorial for? Here are some directions from Silhouette if you need them for loading/cutting vinyl with the machine.
Part 2: Make Vinyl Stencil and Apply to Wood Sign Backing
1. Weed your vinyl
Weed your vinyl decal using a vinyl weeding tool or something with a pin end. Because we are using the vinyl to create a stencil, we want to weed (remove) the positive space or the lettering/design that we are transferring to our wood sign backing. This results in a vinyl stencil! Also, remove the excess vinyl around the outside of the square vinyl stencil box.


2. Apply transfer tape to your vinyl stencil
I use Oratape HT55 transfer tape, which is made specifically for Oracal 631 vinyl. I buy it in bulk (it lasts a really long time) and it works great. But, any other medium to high tack transfer tape should work fine for this project.
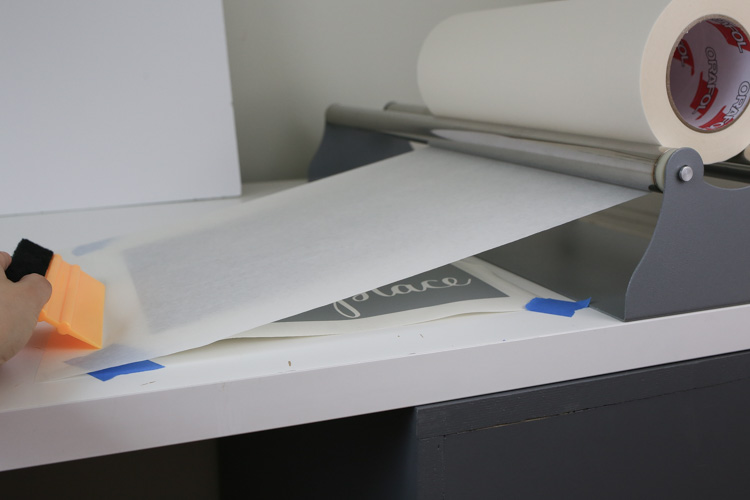
There are several ways to apply transfer tape to vinyl and I will share two methods here. First, is my favorite method using a Transfer Tape Roller. If you make vinyl decals or vinyl stencils often, I highly recommend this tool as it makes applying transfer tape really easy!
Use painter’s tape or masking tape and tape the corners of your vinyl stencil down to the left of the Transfer Tape Roller. Make sure the transfer tape is loaded on the roller as shown in the photo. Then, pull the transfer tape over the vinyl stencil and press the end of it down on the work surface as shown.
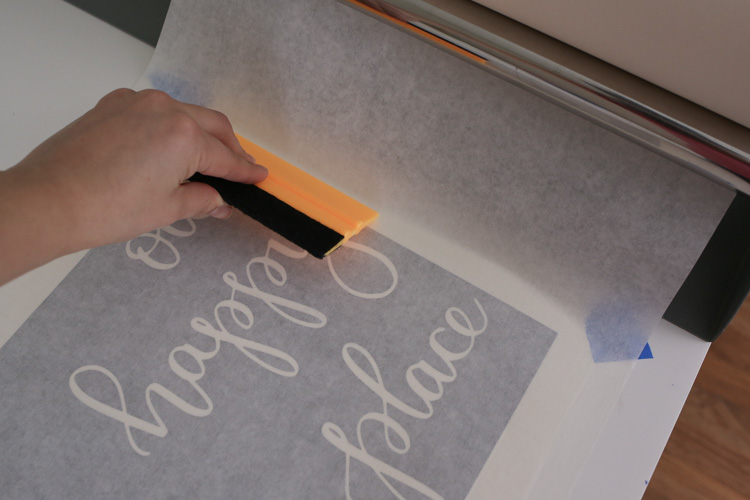
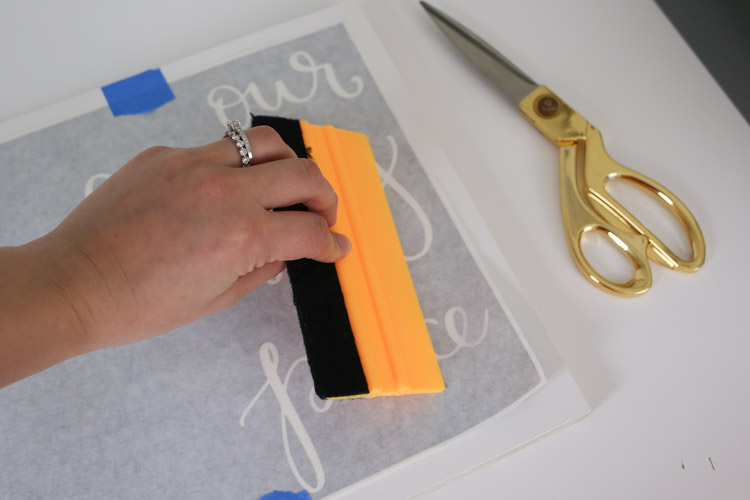
Use a Vinyl Squeegee or old credit card and smooth out the transfer tape over the vinyl stencil. It works best to start towards the center and smooth out to the edges. Use scissors or a razor blade to cut the vinyl stencil off from the transfer tape roller.
Also, it takes some practice getting use to applying transfer tape. If you get a few crinkles in your tape, don’t worry, it usually doesn’t wrinkle the vinyl stencil part.
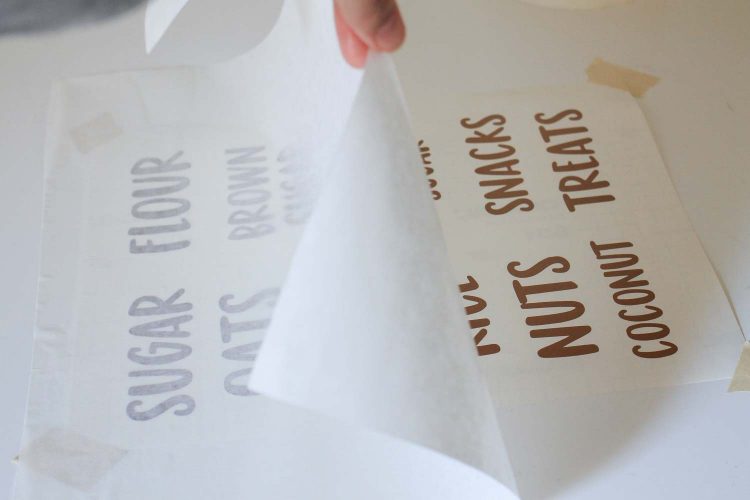
The second way to apply transfer tape, which works fine for smaller vinyl stencils or decals like this sign, is to cut a piece of transfer tape that is a little bigger than the vinyl decal. Then, slowly apply it over the vinyl (which should be taped down to the work surface) with a Vinyl Squeegee or old credit card. I used this method on my DIY pantry label decals.
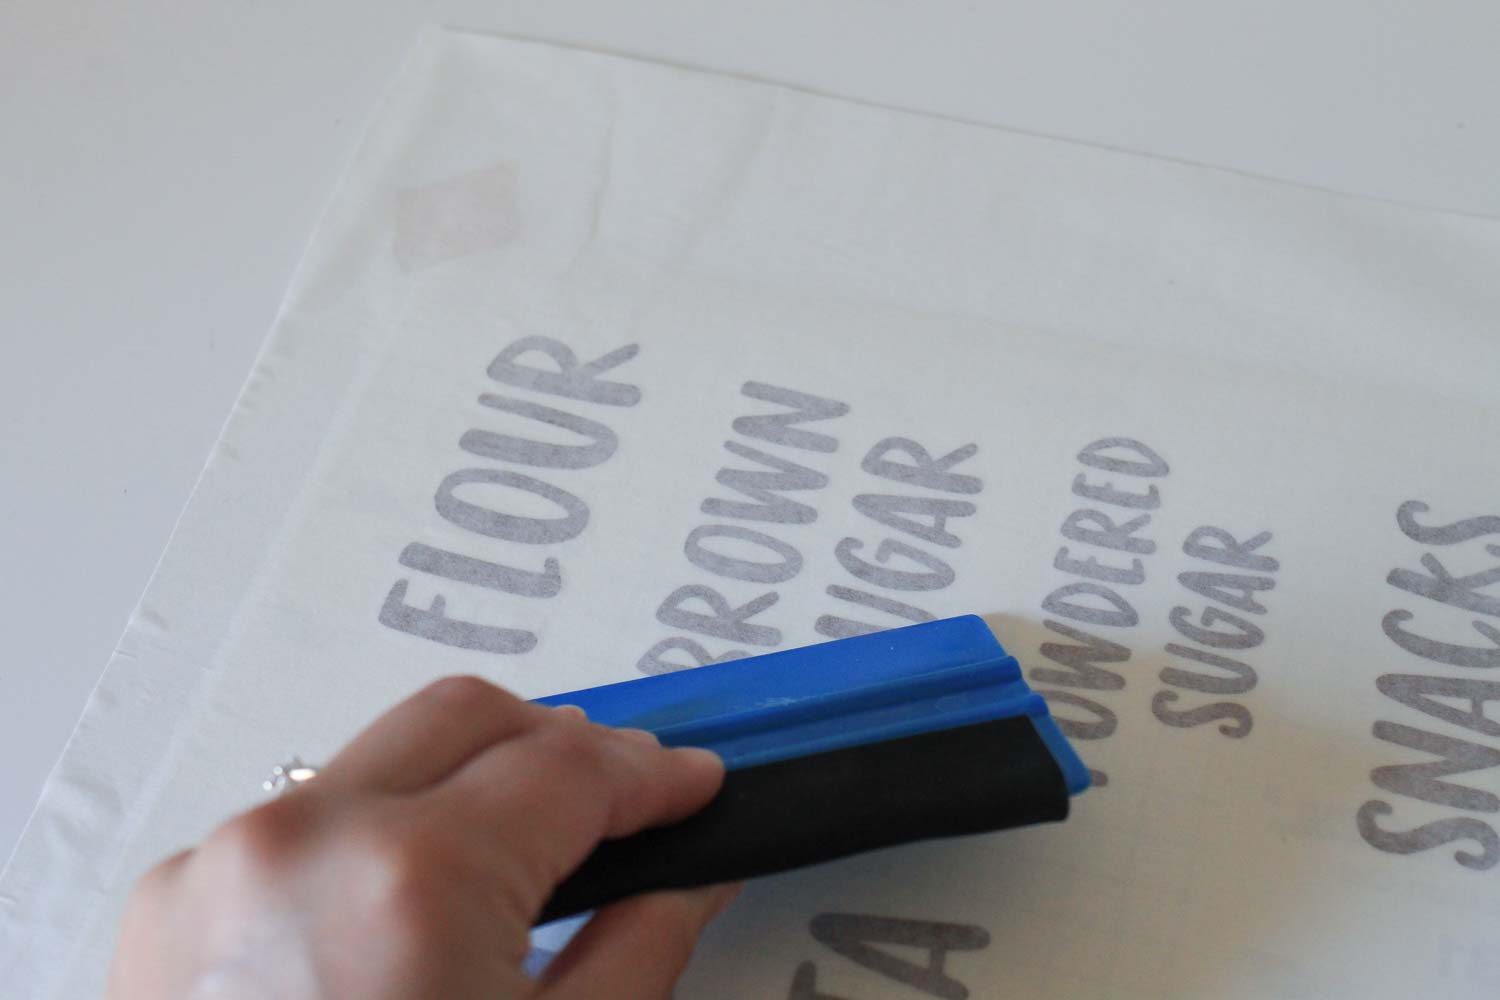
Next, cut around the vinyl stencil box so that only a small white edge remains.

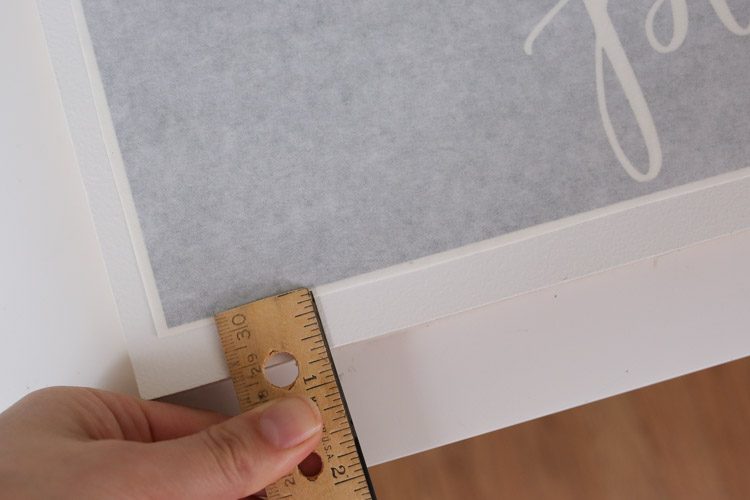
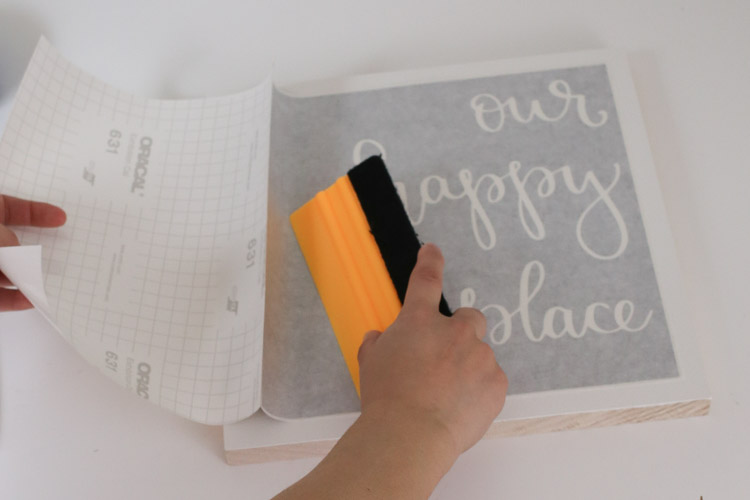
3. Apply vinyl stencil to wood sign backing
Center the vinyl stencil on the wood sign backing. You can either eye it or use a ruler. If using a ruler, measure from the edge of the vinyl stencil box to the edge of the sign on all sides to make sure it’s centered. Then, use painter’s tape or masking tape and tape it down to the wood sign.

Start at one corner and slowly peel off the white backing paper from the transfer tape until it reaches close to the tape in the middle. Make sure as you peel back, the vinyl is stuck to the clear transfer tape. Cut with scissors the loose white backing paper. Then, secure vinyl stencil to wood sign by smoothing down the cut side with a squeegee.
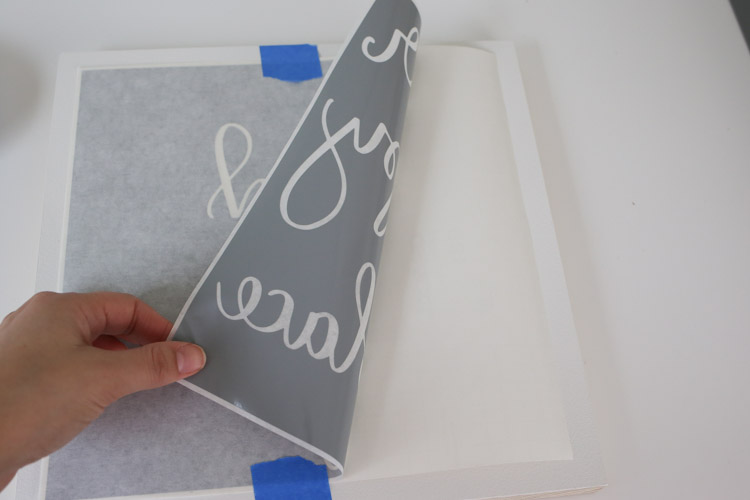

Now that part of the vinyl stencil is attached to the sign backing, remove the rest of the white backing paper and attach the other half. Use a squeegee and rub against the vinyl stencil a few times to make sure your decal is attached to the wood sign backing.
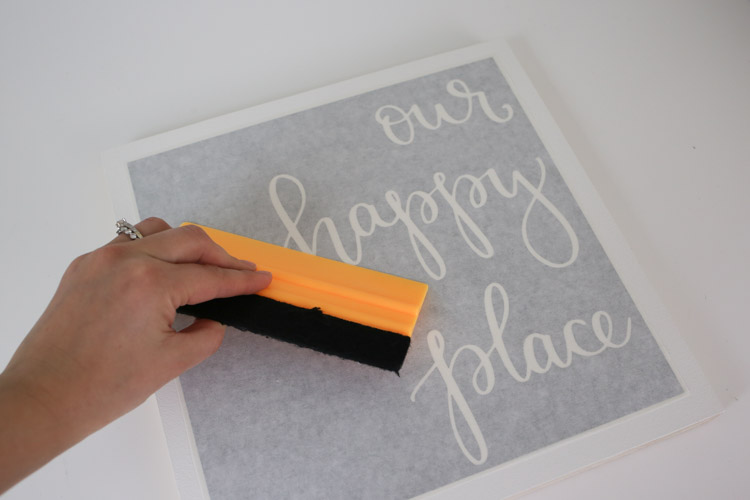
4. Remove transfer tape from vinyl stencil and wood sign
Slowly peel off the transfer tape at a 45 degree angle. If any part of the vinyl starts to come up off the wood sign with the transfer tape, firmly run over that part of the vinyl with a squeegee and peel back the transfer tape again.

Part 3: Paint over vinyl stencil to transfer design to wood sign
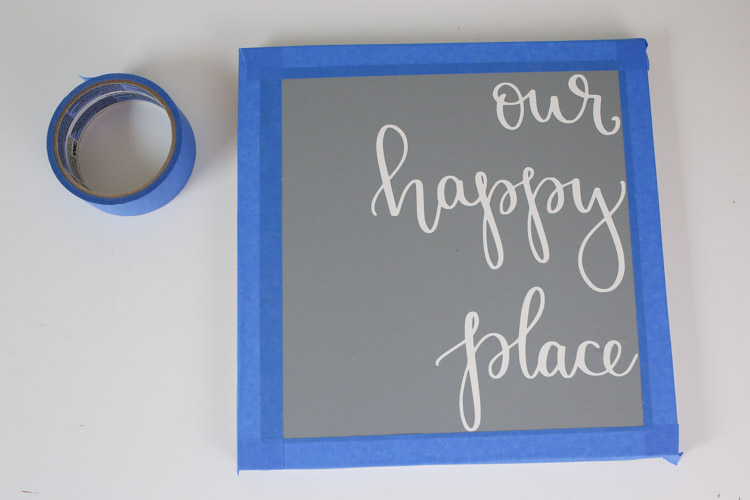
1. Tape exposed edges of wood sign
Use painter’s tape and cover the edges of the sign that are exposed. Make sure to tape as close as you can to the letters of the design.
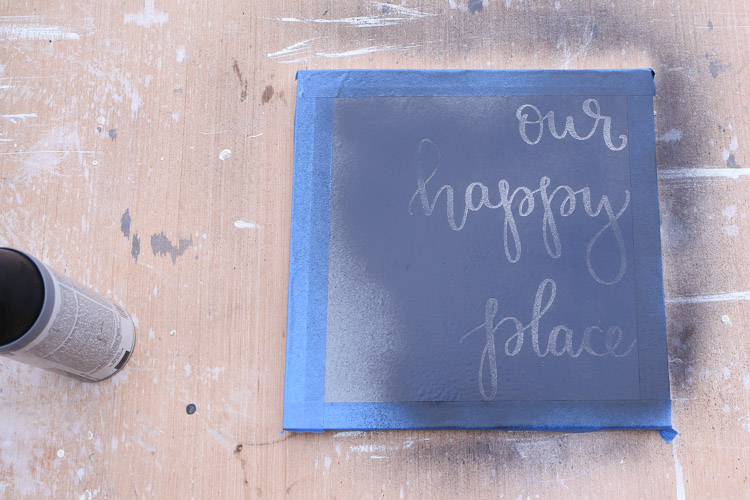
2. Paint over vinyl stencil to transfer design to wood sign
It’s time to paint over our stencil and transfer our design! There are several painting methods to use for this step. Check out my post on how to paint DIY wood signs for more methods. I usually prefer to spray paint, so that’s what I did with this DIY sign. I used a black flat finish spray paint by Valspar. Try to avoid really cheap spray paint.
The key when using spray paint (or any paint) is to do multiple light coats, making sure to wait a few minutes between each coat. If it gets sprayed on too heavy or too close it can cause paint to seep under the vinyl stencil.
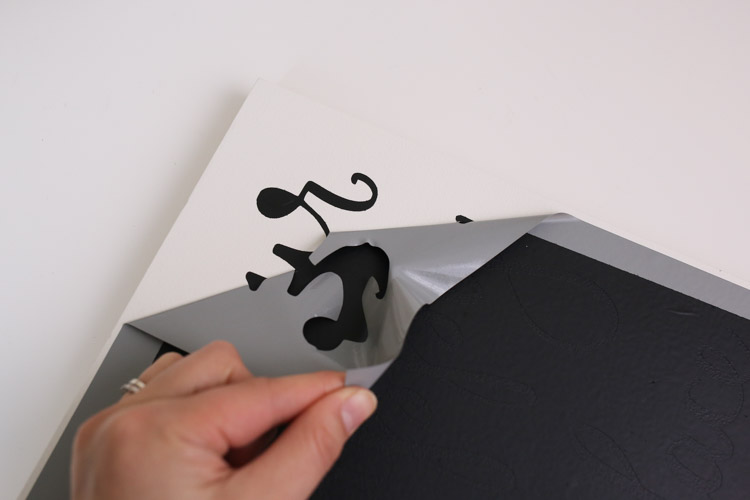
3. Remove tape and stencil from wood sign
Allow paint to dry for at least 1 hour before removing the tape and vinyl stencil.
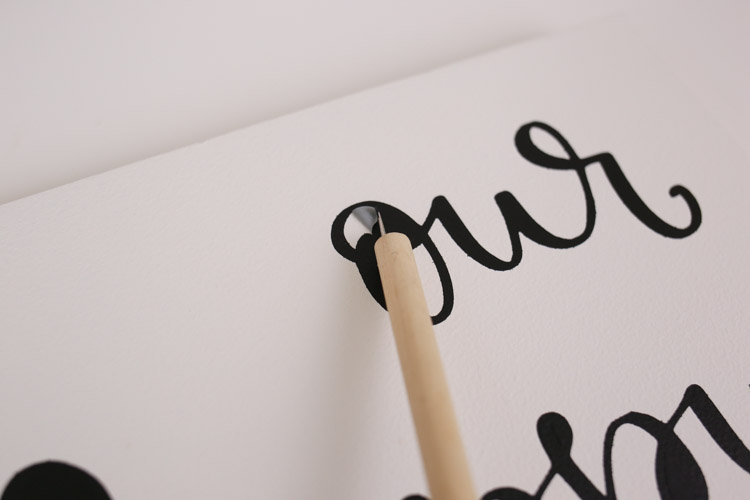
Remove the painter’s tape from the wood sign edges. Then, remove the vinyl stencil from the wood sign by peeling it back at an angle. Use the vinyl weeding tool to remove the floating parts of the letters.
Note, if paint seeped under any part of your stencil, just touch it up with a small paint brush and the white paint you used for the sign backing.
Part 4: Attach Wood Frame to DIY Wood Sign
Now that we’ve transferred our design onto our DIY wood sign, it’s time to add the wood sign framing! I briefly showed how to do this with my DIY wood sign with Calligraphy Quote. But, to learn three, easy, different ways how to frame a wood sign, check out my post on how to frame wood signs.

Free “Our Happy Place” Calligraphy Printable
Click the pink button below to subscribe and get the free Our Happy Place printable which is available in the library of free printables for the home! If you are already subscribed to the newsletter, the printable is now available for download in the free printable library!
(Printables are for personal use only, no commercial use is allowed, thanks!)

Woo, I know that was a long post! I hope it has been helpful in learning how to make DIY wood sign stencils with vinyl!
If you make this sign, please share it with me on social media @angelamariemade or #angelamariemade!
Follow along on Instagram and Facebook for my latest projects!
More From the DIY Wood Sign Series:


Tracie
Thursday 2nd of March 2023
Do you ever have issues with the vinyl stencil pulling up the painted background? I bought cricut stencil film and it pulls up so much paint as it is super sticky. I also tried the freezer paper method and that didn't work at all with the painted background. Is the oracle vinyl the only vinyl you've tried?
Angela Marie Made
Tuesday 7th of March 2023
This could be happening because your paint needs more time to cure. Let the paint fully dry for 3 days and then try removing the vinyl. If you're still having that problem, try waiting a week. You could also try using spray paint, or switching out the paint and trying a latex wall paint if you're using a craft paint. I have also used Cricut vinyl which I also really like!
Donna Jones
Tuesday 16th of March 2021
Hi Lauren- Thanks so much for the great article.
Question, if you want to do a long quote or poem and you size it to fit the wood frame, how do you then fix the issue of the words being way too small to read from a distance , let along trying to weed. I’ve been trying to do the Lord’s Prayer on a 7×20 frame and I have been struggling and wasting tons of vinyl, with still not getting it right.
Any suggestions? Thank you, Donna
Angela Marie Made
Monday 22nd of March 2021
For a smaller text, I will try to use a bolder font in all caps or a larger style font. That way it's easier to read and easier to weed. Hope that helps!
Catalena
Thursday 28th of January 2021
Do you use "permanent" or "removable" vinyl for your stencil?
Angela Marie Made
Monday 1st of February 2021
I use Oracal 631 which is removable.
Vanesss
Saturday 11th of May 2019
Hi! Thank you for your tutorial! I’ve gone through all the steps and it looks great! However, I have some “sticky” parts on the wood from the vinyl after I leaked it off. Do you have any suggestions on how to remove it or prevent from happening again?
Angela Marie Made
Monday 13th of May 2019
You're welcome! To remove it, I would try lightly hand sanding the area with some 120 or 220 grit sandpaper. Or I've heard a pink or white eraser may help with removing it (but I haven't tried that out before). What type of vinyl and paint are you using? I haven't had any sticky residue with the Oracal 631 and latex paint as my base paint. But, to prevent it in the future, I'd recommend avoiding working in really humid areas, so stick to AC if it's hot/humid out (except for when you're spray painting/painting). And also, make sure your base coat of paint has dried and cured for at least 24 hours before applying the vinyl. Let me know if that helps!
Kelly
Wednesday 20th of February 2019
When you remove your stencil, does the paint for the lettering ever get stuck to the stencil and peel up some of your letters? This always happens to me when I use latex paint! Where am I going wrong?! I’m tired of using chalk paint because then i have to put a sealing layer over it!
Angela Marie Made
Friday 22nd of February 2019
I haven't had this happen yet. Maybe try doing multiple, lighter coats of paint? I usually use spray paint for the lettering which I think helps avoid this!